Project 4: Impossible Questionnaire (JS on Rails)

The Backstory

For this project, we dove into vanilla JS. I spent a year coding in JS when I was at NYU Tisch’s ITP program, but almost exclusively within the p5js library. So, a lot of it felt familiar, yet a lot of it really, really didn’t. Specifically manipulating DOM elements wasn’t something we really did using p5. It’s more of a canvas for creating abstract art with code than it is a resource for building web applications.

Early on in the JS curriculum a lot of my fellow cohort students noticed that the example projects that were shown for JS all seemed really impressive and kind of unattainable. I took a closer look at them, however, and I realized that half of them were actually made with p5js, so I considered going down that route.

You can do really amazing visual things with p5js, and it’s also really comfortable territory for me. So in the beginning I considered revamping one of my old projects where I manipulated pixel data to demonstrate the expanding universe with red shift. I wanted to remake it so it would iterate through an API of space images to further demonstrate the concept, but it was hard to get a consistent stream of space images that weren’t illustrations, even from NASA’s APIs.

Spacebar for fullscreen.
Press 1 or 2 to toggle redshift or blueshift. Press 0 to reset.
Or just wait for the slide show.

I made a version that iterates through some Hubble images (gitHub link here) via their “print shop” collection in their API, but again, the images need to be consistently uncolorized and of a similar scale for the demonstration to work. Anyways, in the end I decided to pursue a fully vanilla JS project. Not because of any failure or inability to execute my p5 project, but ultimately I wouldn’t have learned anything from rehashing old projects. Oh, and if you do try to run the one on gitHub, it only works using liveserver due to some cors issues I’m still figuring out.


A very leading Donald Drop performance review
 

Impossible Questionnaire

I really don’t remember how I came up with the idea, but ultimately I built a whole project around a punch line: A Donald Trump exit survey where any answers that weren’t flattering ran away from you.

The requirements of the project are to make a single-page app where all of its functionality is built with vanilla JS with Rails as the backend. Here is the github repo link. I think it came out pretty well. I’m particularly proud of this one.

Here is a full video walkthrough of it:


Building it

The project started with a Rails backend, piggybacking off our Rails knowledge from out last projects. That part was pretty simple once I had really decided how my data structure was going to work. One of the requirements is that our domain models have a has_many : belongs_to relationship.

For mine, a Questionnaire has many Questions and a Question belongs to a Questionnaire.

screen-11-23-2020-03.jpg
 
screen-11-23-2020-05.png
 

Creating the schema took a lot of thought and consideration. It’s also a really important decision when building an app. Any changes you make to your schema have a tendency to permeate into the rest of your app, so it’s helpful to have a solid database foundation before moving forward. The Questionnaire model is easy enough. It’s the Question model that took more thought, because each answer would have their own unique attributes. I needed a way of identifying which was the correct answer, most importantly. I considered making an Answer model to take care of the answer attributes, but that was just too daisy-chained. In the end I created ActiveRecord columns for “answer_1, answer_2, answer_3, answer_4, correct_answer”. A question object would also have “content”, meaning the question itself. Here’s my schema:


Once I felt good about my data structure, I had to convert my Rails objects into JSON objects from their respective controllers. I decided it made the most sense to have a single API (the “Questionnaires”) take care of sending all the data. So I made my Questionnaires json have access to all of the relevant Question data that each Questionnaire would have.


I should also note that I never actually used the “show” action, but I made it in the beginning anticipating the possibility that I might. I also opted not to use a Serializer for my json data because I wasn’t really doing anything that complicated, and in this particular case it would’ve been more trouble than it would be worth.

Facing my CSS Demons

I had been somewhat successfully fumbling through CSS through most of the curriculum so far, but this time I decided to take a long, hard look at it and really try to understand it. It’s too valuable an asset to ignore. I spent an hour reading about Bootstrap during the last project, but I was overwhelmed by it and put off understanding it, yet again.

I think part of my problem was that I fundamentally didn’t understand what the hell Boostrap was. I only knew that people kept talking about it as an “easy” way to style a web app. Once I actually read through their getting started docs (their docs are super user-friendly btw), it was much less intimidating.

Honestly, all Bootstrap is, is a fancy stylesheet that you can just link to with a URL. That’s all it is. It’s actually a little uncomfortable to use because you don’t actually have the assets to see what’s going on under the hood. But their documentation is so clear, it really is an amazing resource to have.

More CSS Demons

Demons would be an exaggeration at this point, because I was feeling more comfortable, but I did spend a lot of time on MDN CSS docs just figuring out how to manipulate various style attributes. The sort of “main event” of the app is very much dependent on style attributes to animate the fleeting answers of the questionnaires.

Actually, before I even decided to proceed with this project, I had to make sure I would be able to accomplish some sort of interactive effect that would make my punchline plausible. I started with simple “:hover: attribute on my stylesheet. I should back up: in addition to using bootstrap, I used another .css file where I could write attributes that would override bootstrap attributes and help me create the desired effects I was going for.

So, I started with a simple css hover attribute that looked like this:

screen-11-23-2020-09.png
 

This is basically saying (in pseudo-code) “When you hover over the wrong answer, declare that elements position as relative, move it by 150px from the top and from the left, bring it above the other elements, and make its background white. This accomplishes moving all of the wrong answers in a singular direction, but it feels less alive when they’re all going to the same relative place.

You’ll notice that commented out is also “visibility: hidden.” I also experimented with just hiding that element entirely when you hovered over it. But I also found it to be glitchy, so I also used it in combination with moving the element out of the way, and that did a nice thing. But, in the end, I did the final animation with JS.

function animateWrongAnswers() {
    const wrongAnswers = document.querySelectorAll(".input-group[answertype=wrong]")

    wrongAnswers.forEach(answer => {
        answer.querySelector(".input-group-text").addEventListener('click', e => {
            e.target.checked = false;
        })
        
        answer.addEventListener('mouseover', e => {
            let plusOrMinus = Math.random() < 0.5 ? -1 : 1;
            let randomCoord = Math.random() * 200 * plusOrMinus;

            e.target.parentElement.style.left = `${randomCoord}px`;
            e.target.parentElement.style.top = `${randomCoord}px`;

            setInterval(function() {
                resetCoords(e);
            }, 2000);

            function resetCoords(e) {
                e.target.parentElement.style.left = "0px";
                e.target.parentElement.style.top = "0px";
            }
        })
    })
        
}

Building with OOJS

This was only a small portion of the work that went into this project — a very small part. I also only did this at the very end of my work. Where to even begin?

Fortunately, I did have experience with object oriented Javascript from my p5js days. Here is my very first OOJS project:

Click to create planets. Click on planets to delete them.

The first thing I did after making a basic web page skeleton with bootstrap was populate the DOM with an actual questionnaire, because what good would the rest of the functionality be if I couldn’t even display one questionnaire?

I created a Questionnaire class:

class Questionnaire {

    constructor(obj) {
        this.id = obj.id;
        this.title = obj.title;
        this.result = obj.result;
        this.featured = obj.featured;
        this.questions = obj.questions;
        this.description = obj.description;
        Questionnaire.all.push(this)
    }

    static all = [];
...
}

I deliberated for a while about whether or not I wanted to create a Question class or if my Questionnaire class should be in control of everything. I actually did start building my app out with just the Questionnaire class, but in the end I felt it made more sense to create a Question class after all.

class Question {
    constructor (obj) {
        this.id = obj.id;
        this.content = obj.content;
        this.answers = {
            answer_1: obj.answer_1,
            answer_2: obj.answer_2,
            answer_3: obj.answer_3,
            answer_4: obj.answer_4, 
            correct_answer: obj.correct_answer
        }
    }
  ...
}

Now that I had my foundation for dealing with Questions and Questionnaires, I also needed a way to get data from the backend, which I did with an Api class:

class ApiService {

    constructor(baseUrl) {
      this.baseUrl = baseUrl;
    }
  ...
}

This handles all of the fetch requests to and from the database.

Widdling Away at the Functionality

Now I had my objects set up and I just wrote class method after class method getting features to work one at a time. Here was my order of operations (grossly oversimplified of course) in how I built out the app.

  1. Display a single questionnaire, and make that method reusable to other questionnaires

  2. Fetch and receive all questionnaires

  3. Display all questionnaires

  4. Be able to click on those displayed questionnaires and view that single questionnaire (using the method from step 1)

  5. Create a questionnaire form

  6. Have that form send a post request to the backend, then display that questionnaire (again using the method from step 1)

  7. Build out the navbar buttons (and attach them to previously built methods, and soon-to-be-built methods)

  8. Make a functional search bar that displays a filtered index (recycling the method built from step 3)

  9. Filter out questionnaires with the “featured” attribute and populate the dropdown with them

  10. Have the dropdown items navigate to the correct questionnaire when you click on them

  11. Make a cool method that makes the non-desired answers run away

That’s how I created it, just focusing on one task at a time. This really was a heady project. There’s something about Javascript that makes it a very involved intellectual exercise every step of the way. Me, personally, I really enjoy coding in Javascript. I think it’s a lot of fun, and there’s a lot of freedom in how limitless it is. I do acknowledge, however, that it can be just as equally frustrating.

It really is impossible to go into all the hurdles and triumphs that happened during this project. It was an emotional adventure, but coding often is. Here is my github repo once again if you’re curious. And please do feel free to comment or reach out to me with any questions.

Project 2: COVID Stories — A Sinatra web app

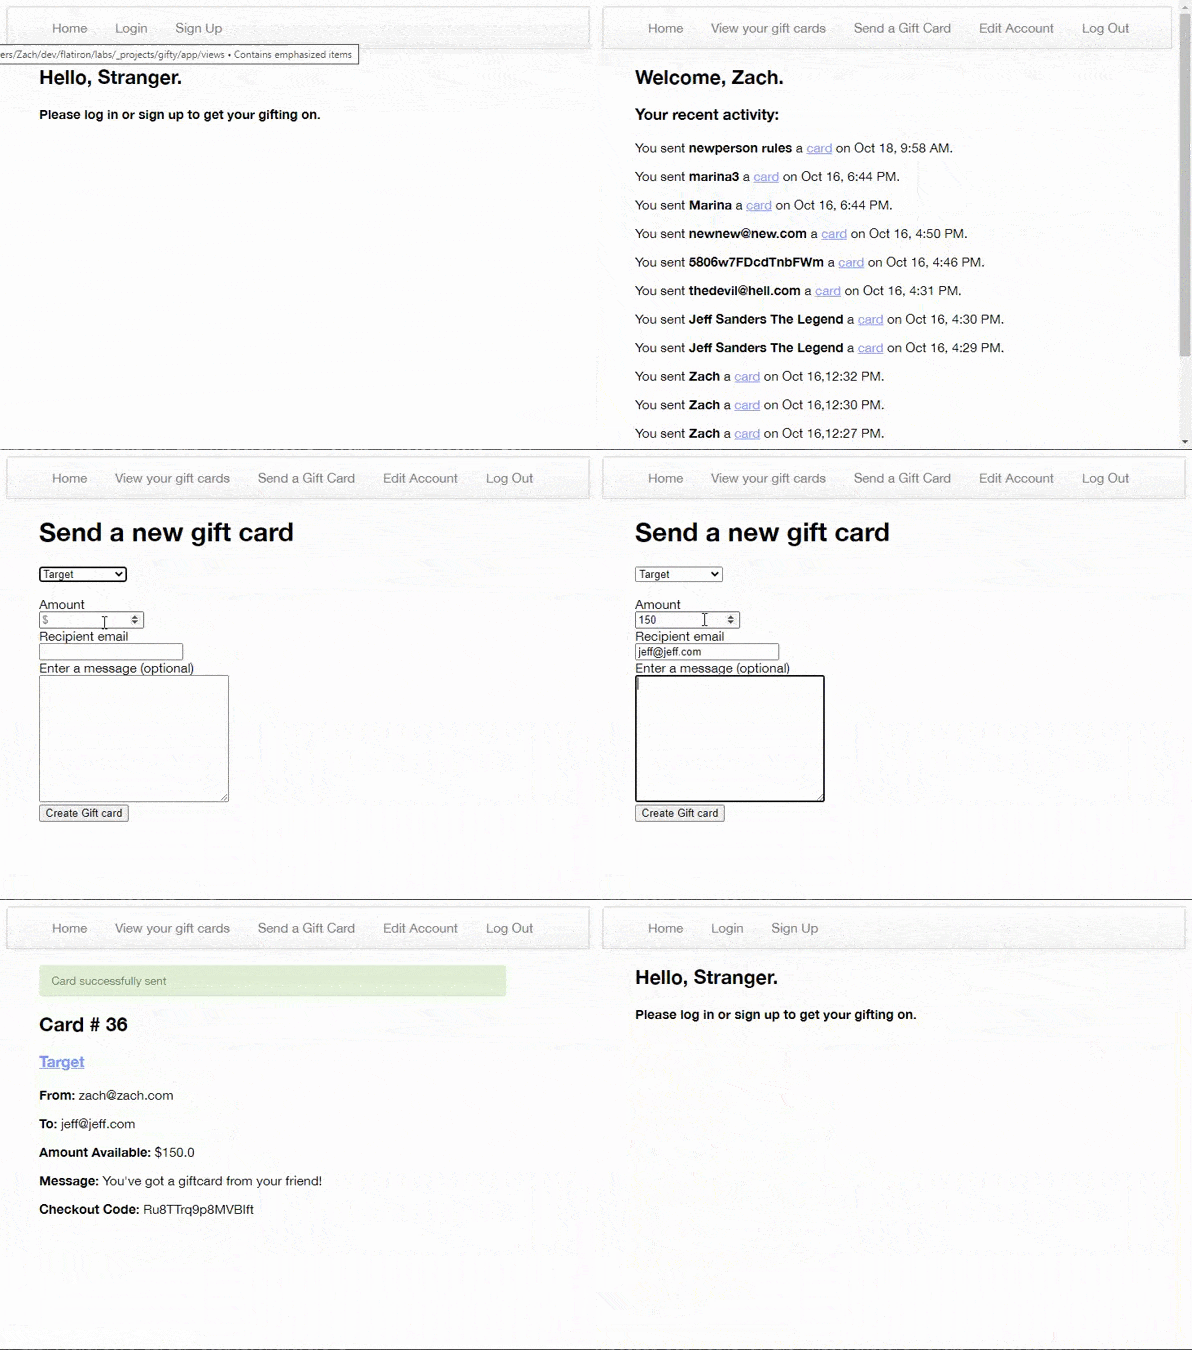
Screen grab walk through of COVID-stories web app
 

Update:

My app is live via Heroku. Click here to navigate to it.

First Obstacles

Here is a link to my github repo for this project.

This app was built with the intent of making a sort of “post secret” space for people's experiences in the COVID-19 world. The spirit of the app is to have an anonymous space where you can share stories without judgement or fear of retaliation. This is my second Flatiron project — the goal being understanding HTTP routes, user validations, ActiveRecord, SQL and database management within a Sinatra framework. While it's meant to be an anonymous platform, you can create an account and manage your content, mostly out of an obligation to the project requirements.

This was our first foray into actual web development. Initially I struggled a lot with HTTP routes, or at least I thought. On one of the earlier route labs, It just did not make sense, and it was really frustrating. Later I realized that I wasn’t refreshing the right page in order to see the changes I made — so dumb in hindsight.

I often run into this as a newbie: If something isn’t working right, I jump to the assumption that it’s my ineptitude or inability to grasp the concept. It couldn’t possibly be something as simple as not refreshing. So you end up spending time debugging something that isn’t there because of self-doubt. Always a work in progress.


Gaining some confidence

Once I began to trust my understanding of HTTP routes, things went more smoothly. It really was a long journey of following the HTTP thread. I found, as well as my fellow cohort compatriots, that the best way to debug routes is to put up a big giant billboard on the other side of your route. Wherever your next GET request is going to, put a giant <h1>title that says “You made it to the (page you’re looking for) page! Congratulations!” From there it’s easy enough to gather the appropriate data in your controller and display it on that page.

It was also really helpful to follow the RESTful route architecture. Standardized systems make it really easy to build your navigation concisely, and it also makes it easy for other developers to work with your code.


Building the Data

My application has a very simple database structure. A user has many stories, and a story belongs to one user. Thanks to ActiveRecord I can create those SQL association by literally saying the User model “has_many” stories, and Story “belongs_to” User.

“class&nbsp;Story&nbsp;&lt;&nbsp;ActiveRecord::Base&nbsp;&nbsp;&nbsp;&nbsp;belongs_to&nbsp;:userend”
 

My User class looks a little different, because that is where I set up password encryption and username validation, which I will get into later.

class&nbsp;User&nbsp;&lt;&nbsp;ActiveRecord::Base&nbsp;&nbsp;&nbsp;&nbsp;has_many&nbsp;:stories&nbsp;&nbsp;&nbsp;&nbsp;has_secure_password&nbsp;&nbsp;&nbsp;&nbsp;validates&nbsp;:username,&nbsp;presence:&nbsp;true&nbsp;&nbsp;&nbsp;&nbsp;validates&nbs…
 

ActiveRecord is so amazing. Just by declaring the “belongs_to” and “has_many” relationship in my models (and having them inherit from ActiveRecord::Base) I can easily create actual Class objects the relate to each other appropriately. After building dynamic ORM apps from scratch in earlier labs, I greatly appreciate what ActiveRecord is doing for me here. It’s a lot.

I should back-track. Before setting up my ActiveRecord models, I created my database migrations in order to create my data table.

class CreateUsersTable &lt; ActiveRecord::Migrationdef changecreate_table :users do |t|t.string :usernamet.string :first_namet.string :password_digestendendend
 
class&nbsp;CreateStoriesTable&nbsp;&lt;&nbsp;ActiveRecord::Migrationdef&nbsp;change&nbsp;&nbsp;&nbsp;&nbsp;create_table&nbsp;:stories&nbsp;do&nbsp;|t|&nbsp;&nbsp;&nbsp;&nbsp;&nbsp;&nbsp;t.string&nbsp;:title&nbsp;&nbsp;&nbsp;&nbsp;&nbsp;&nbsp;t.strin…
 

The :password_digest line of the Users table is an important part of how ActiveRecord’s password encryption works. By naming your column “password_digest,” ActiveRecord created the attribute “password” for your User class, but stores it under the column “password_digest” in an encrypted format using the “bcrypt” gem. This means that even I, the developer, don’t have access to the passwords in the database.

Building it MVC

After building the database and models (using ActiveRecord), the remaining parts of the “MVC” application (Models, Views, Controllers) were to create views and controllers. I found the easy way to do this was to navigate the app from a user-interface point of view. So if a user starts at the home page, let’s build the “/” route and controller, and if the next place they go is the index page, let’s build the “/index” route and controllers, and so on.

One of the requirements for this project was to have CRUD (Create, Read, Update, Delete) functionality. So, I made sure my users could do just that with their COVID stories. That work happened almost entirely in the “StoriesController".”

class&nbsp;StoriesController&nbsp;&lt;&nbsp;ApplicationController &nbsp;&nbsp;&nbsp;&nbsp;get&nbsp;'/stories'&nbsp;do&nbsp;&nbsp;&nbsp;&nbsp;&nbsp;&nbsp;&nbsp;&nbsp;if&nbsp;current_user&nbsp;&nbsp;&nbsp;&nbsp;&nbsp;&nbsp;&nbsp;&nbsp;&nbsp;&nbsp;&nbs…
 

There are some helper methods not shown above, but you get the idea of the narrative that’s taking place in each of these routes. For example, in get ‘/stories/:id/edit” I’m basically saying, get the current story (having just come from a story “show” page) and its data. If you’re logged in, and your session id matches the id of that story, then show the “edit” page where you can edit that story. This is a form of validation where if you navigate to the url of the edit page of this story in your browser, my app won’t let you edit the story you’re looking at unless you’re both logged in, and that your logged in credentials match those of the story creator’s. Otherwise, you get redirected to your personal story index page so that you can edit your own stories (if you’re logged in and the story’s not yours), or it will still bring you to the edit page anyways (having not met either of the first conditions), except on the other side of it is some conditional formatting waiting for you that will tell you you can’t edit that story.

You must be&nbsp;logged in&nbsp;to edit stories.
 

Conditional Formatting

I did a lot of conditional formatting on the “welcome” page, which was a fun process.

&nbsp;&nbsp;get&nbsp;"/"&nbsp;do@stories&nbsp;=&nbsp;Story.all@sorted_stories&nbsp;=&nbsp;@stories.order(id:&nbsp;:desc)@random_stories&nbsp;=&nbsp;@stories[0..-2].sample(10)&nbsp;&nbsp;&nbsp;&nbsp;erb&nbsp;:welcomeend
 

This is the get route for my welcome page. It’s storing three things in instance variables to be made available to the “welcome” view. @stories is the entire collection of stories. @sorted_stories is the stories sorted newest to oldest. @random_stories is the one I wanted to talk about the most though.

It will make more sense after seeing my welcome.erb file.

<h2>Covid Stories</h2>
<strong><%=@stories.last.title%></strong><br>
  <%=@stories.last.content%><br><br>
  <%if @stories.length <= 10%>
  <%@sorted_stories[1..-1].each do |story| %>
    <strong><%=story.title%></b></strong><br>
    <%=story.content%><br><br>
    <%end%>
  <%else%>
  <%@random_stories.each do |story| %>
    <strong><%=story.title%></b></strong>
    <%=story.content%><br><br>
    <%end%>
  <%end%>

Here I’m displaying the title and content of the most recent story. Then I’m iterating through all of the available stories except for the newest one (“@sorted_stories[1..-1]”). But before that I’ve created an “if” statement of “if @stories.length <= 10.”

Conceptually what I’m saying is “If there are ten or fewer stories, display them all, newest to oldest. Otherwise pick ten random stories from the collection and display them, but still display the newest story created at the top.” The idea is that if the database ended up being populated with hundreds or thousands of entries, you would see new content every time you visited the welcome page because it would be a random sample of stories. So you could refresh the page and see something new every time.

The line “@random_stories = @stories[0..-2].sample(10)” from the ApplicationController is how I was able to do that. “.sample” choosed at x number of random items from a collection, “x” being specified in an argument. In my case, “10.”

Other Validations

In addition to ActiveRecord back-end validations, I also implemented some front-end validations using simple HTML. For example, for my username input on my signup form, I put:

 <p><input type="text" placeholder="Username: " name="username" pattern=".{3,20}" required></p>

The phrase “pattern=".{3,20}" required” makes the input field a required field, and it also makes it so the input must be at least 3 characters with a max of 20.

Some other ActiveRecord validations I used are “validates :username, presence: true” and “validates :username, uniqueness: true.” The presence validation just makes sure the username isn’t blank, while the uniqueness validation checks whether or not the username already exists in the database, so you can either log them in if they already have an account, or deny their signup form if that username already exists. From there, in my post ‘/users’ route I can check for errors using ActiveRecord’s “.valid?” or “.errors.” You can also use “.errors.full_messages” to print some nicely formatted strings of your validation errors. That looks like this:

Error:Password confirmation doesn't match PasswordUsername has already been takenPlease return to signup and try again.
 

ActiveRecord validation will also check if you have two identical fields in a row (like a password confirmation) and check that they match. That’s a validation built into ActiveRecord that you don’t have to explicitly setup other than having two password fields in your form.

Anonymous Posting

The anonymous posting functionality (vs. the logged-in posting) operates pretty simply: If you’re not logged in and you create a post, that post has no user_id. If you are logged in, it does. That way the main show page (welcome page or get ‘/’) shows any kind of story whether or not it belongs to a user, but if a user wants to view their stories or edit them, they only have access to stories that they have created.

Takeaways and Next Steps

To simplify my life, I stripped away all of the CSS from my project, but the next thing I want to do is revisit the HTML and CSS curriculum and really get a better handle on those concepts. I have experience doing hacky things with CSS and HTML, but it can’t hurt to have more practice. My next project won’t be so bare visually, although I do think it works well aesthetically for this particular project. I really wanted it to be just about people’s stories.

For a video walkthrough of my app, please see below:

Project 1: CLI Web Data App

I’ve been aware of NASA’s open APIs for a while, and I’ve always wanted to do something with them, so when the instructions for our first Flatiron project were to use web data either via scraping or API, I immediately went there for resources.

I should clarify: I’ve been aware of APIs in general, having some experience with coding, and I sort of knew what they did, but I had never actually worked with an API. And generally speaking, when designing a project, popular wisdom dictates you should always begin with the question: “What problem am I solving?” I did not do this. I knew I wanted to use a NASA API, and I was determined to do so.

class MartianWeather
    attr_accessor :sol, :date, :season, :avgtemp, :hightemp, :lowtemp, :avgws, :highws, :lowws, :winddir, :pres

    url = "https://api.nasa.gov/insight_weather/?api_key=&feedtype=json&ver=1.0"
    uri = URI(url)
    response = Net::HTTP.get(uri)
    @@api_data = JSON.parse(response, symbolize_names: true)

    @@all = []
    @@forecast = []

    def initialize
    end

    def self.create_instances
        @@api_data.each do |s| 
            if s[0] != :sol_keys
                if s[0] != :validity_checks
                    o = self.new
                    o.sol = s[0].to_s
                    o.date = s[1][:Last_UTC].split("T").first
                    o.season = s[1][:Season]
                    o.avgtemp = o.c_to_f(s[1][:AT][:av]).round()
                    o.hightemp = o.c_to_f(s[1][:AT][:mx]).round()
                    o.lowtemp = o.c_to_f(s[1][:AT][:mn]).round()
                    o.avgws = o.mps_to_mph(s[1][:HWS][:av]).round()
                    o.highws = o.mps_to_mph(s[1][:HWS][:mx]).round()
                    o.lowws = o.mps_to_mph(s[1][:HWS][:mn]).round()
                    o.winddir = s[1][:WD][:most_common][:compass_point]
                    o.pres = o.pa_to_hpa(s[1][:PRE][:av]).round(2)
                    o.save
                end
            end
        end
    end
 

Extracting data from the Mars InSight API was relatively easy. Since it was my first time messing with APIs I had a little confusion figuring out which parts of the data were hashes vs arrays, but by the end of this project I felt really comfortable figuring out what’s what in an API hash.

At this point in the project I had satisfied my own personal desire to do something with NASA data, and I had it all worked out in my MartianWeather class. But what to do with it?

I decided to make make a program that compares Earth weather data with Martian weather data. Why you ask? To help you feel better about your life, because at least you’re not living on Mars where the temperature is -107°F. And I wanted to add some dark humor to it — make it playful.

My first task in comparing Martian weather to Earth weather was to acquire the Earth weather data. Openweatherdata.org has really good, free APIs for this kind of thing. The problem from a user experience point of view, however, is that you call these APIs with latitude and longitude data to get your locale. Programs that get local data for you don’t generally ask you for your latitude and longitude. If this were a mobile app, it could get it from your GPS, but for this simple CLI I had to come up with something else. I found an API that provides lat-longs based on U.S. zip codes, so that ended up being sort of the crux of the Earth-side of my program.

class LatLongCreator

    attr_accessor :zip, :latitude, :longitude, :city, :state

    def self.create_latlong_from_zip(zip)
        @zip = zip
        url = "https://public.opendatasoft.com/api/records/1.0/search/?dataset=us-zip-code-latitude-and-longitude&q=#&facet=state&facet=timezone&facet=dst"
        uri = URI(url)
        response = Net::HTTP.get(uri)
        @@api_data = JSON.parse(response, symbolize_names: true)
        unless @@api_data[:nhits] == 0
            @latitude = @@api_data[:records].first[:fields][:latitude]
            @longitude = @@api_data[:records].first[:fields][:longitude]
            @city = @@api_data[:records].first[:fields][:city]
            @state = @@api_data[:records].first[:fields][:state]
            latlong = [@latitude, @longitude, @city, @state]
        end
    end
end
 

Above is my Latlong_Creator class. The user experience of accessing Earth weather data via your zip code would not work without this class and this API. It returns an array of latitude, longitude, city and state. I call that method from my CLI, store the city and state data for CLI purposes, and then I feed the lat-longs to my EarthWeather class by interpolating them into the API endpoint calls from that class. For example, the forecast API:

https://api.openweathermap.org/data/2.5/onecall?lat=#{lat}&lon=#{long}&units=imperial&exclude={part}&appid=3ef2f9e27db06e5523669088cdd44570

Here you can see how my variables “lat” and “long” are being interpolated into the API url.

In terms of order of operations, I actually did the historical Earth weather data first in order to compliment the historical data from Mars I already had. It turns out that you can only call one day of data at a time from this API. So I called this API six times (for five days of historical data and one for current weather), each time interpolating the lat-longs, but I also had to interpolate the time in Unix time that I wanted the data to start from. I accomplished this with the following expression:

i = 0
        6.times do
            time = (Time.now - (86400*i)-1000).to_i

The way I separated data by days was by using the magic number 86400. What is this number? The number of seconds in a day. So, in Ruby, Time.now - 86400 basically means “this time yesterday.” So, by multiplying the index by 86400 and subtracting it from Time.now I was able to make six different calls to the API, each one day apart (give or take however many fractions of a second had passed between each call). Here is the full method .create_instances for creating the historical and current Earth data:

def self.create_instances(lat,long, city, state)
        @@all = [] #only storing one zip at a time, clears all
        i = 0
        6.times do
            time = (Time.now - (86400*i)-1000).to_i #converts to unix #-1000 to account for difference in clocks, can't be in future
            o = self.new
            url = "http://api.openweathermap.org/data/2.5/onecall/timemachine?lat=#&appid=3ef2f9e27db06e5523669088cdd44570"
            #api call defaults units to imperial
            get_data(url)
            o.date = Time.at(@@api_data[:current][:dt]).to_s.split(" ").first
            o.season = o.get_season(Time.at(@@api_data[:current][:dt]))
            o.lat = lat
            o.long = long
            o.city = city
            o.state = state
            o.winddir = o.convert_wind_deg_to_dir(@@api_data[:current][:wind_deg])
            o.avgtemp = @@api_data[:current][:temp].round()
            o.status = @@api_data[:current][:weather].first[:description]
            o.avgws = @@api_data[:current][:wind_speed].round()
            o.pres = @@api_data[:current][:pressure]
            o.save
            i += 1
        end

    end
 

From there I had to create the forecast data for both Earth and Mars. Earth was easy. There was a single API that would return all of that data, again from the lat-longs that my LatlongCreator class had created. The Martian data, however, was non-existent. So I made it up! I iterated through the existing, real Martian data, and then created a new dataset by randomizing the values slightly.

def self.create_forecast
        #dependent on .create_instances having been called
        directions = ["N", "NNE", "NE", "ENE", "E", "ESE", "SE", "SSE", "S", "SSW", "SW", "WSW", "W",
                         "WNW", "NW", "NNW", "N"]
        
        @@all.each.with_index(1) do |d, i|
            o = self.new
            o.sol = (get_current_sol+i).to_s
            o.date = (Time.now+86400*i).to_s.split(" ").first
            o.season = @@all.last.season
            o.avgtemp = d.avgtemp+(rand(-10..10))
            o.hightemp = d.hightemp+(rand(-10..10))
            o.lowtemp = d.lowtemp+(rand(-10..10))
            o.avgws = d.avgws+(rand(-10..10))
            o.highws = d.highws+(rand(-10..10))
            o.lowws = d.lowws+(rand(-10..10))
            o.winddir = directions[rand(0..directions.length-1)]
            o.pres = (d.pres+(rand(-10..10))).round(2)
            @@forecast << o
        end
    end
 

In the above, you can see that I just accessed existing data of each MartianWeather object, and then called things like “rand(-10..10) on them. This is saying, “Take the original value and add a random value between -10 and 10 to it.” By doing this, I create what appears to be a dataset that is unique, yet also resembles actual Martian data (even though it’s not real). I also used “.each.with_index(1)” in order to create dates that correspond to the new, made-up data.

From there, there were a ton of little things I had to do to make all of the data comparable to each other. On the Earth data, I simply set the units of measurement to imperial (keeping in mind that my lat-longs only work on U.S. zip codes, so it wouldn’t make sense to use any measurement other than imperial) in the actual API call for Earth weather.

With the Martian data, I had to do a few conversions. I also had to do a few conversions with other Earth data. For example, the Martian wind direction data from the NASA API are strings representing compass directions, like “ENE” or “WNW.” The Earth data was in compass degrees, and that was kind of tricky to convert. In order to fix that problem, I made a method in EarthWeather that converts compass degrees to compass directions.

def convert_wind_deg_to_dir(degrees)
        d = 22.5
        winddir = ""
        case
            when degrees <= d
                winddir = "N"
            when degrees < d*2 && degrees >= d
                winddir = "NNE"
            when degrees < d*3 && degrees >= d*2
                winddir = "NE"
            when degrees < d*4 && degrees >= d*3
                winddir = "ENE"
            when degrees < d*5 && degrees >= d*4
                winddir = "E"
            when degrees < d*6 && degrees >= d*5
                winddir = "ESE"
            when degrees < d*7 && degrees >= d*6
                winddir = "SE"
            when degrees < d*8 && degrees >= d*7
                winddir = "SSE"
            when degrees < d*9 && degrees >= d*8
                winddir = "S"
            when degrees < d*10 && degrees >= d*9
                winddir = "SSW"
            when degrees < d*11 && degrees >= d*10
                winddir = "SW"
            when degrees < d*12 && degrees >= d*11
                winddir = "WSW"
            when degrees < d*13 && degrees >= d*12
                winddir = "W"
            when degrees < d*14 && degrees >= d*13
                winddir = "WNW"
            when degrees < d*15 && degrees >= d*14
                winddir = "NW"
            when degrees < d*16 && degrees >= d*15
                winddir = "NNW"
            when degrees >= d*16
                winddir = "N"
        end
        winddir
      end

Unfortunately, there was no good way to avoid hard-coding direction strings (at least that I could think of), but at least I got them to correlate to degrees in kind of a clever way.

There were a ton of other little quests I had to accomplish to wrap all of this up in a coherent way, but I won’t go into ever single one. The last step was creating my CLI (command-line interface). That part was pretty straightforward. My CLI class has a “start” method that gets called on initialize. The first thing it does it display a cute, sarcastic welcome that I wrote and ask you your zip code. From there it makes all the API calls to gather the Martian and Earth data (8 API calls in addition to the zip code converter — Remember I had to call the archived Earth data 6 times).

Then it compares your current weather with current Martian weather, and then displays a menu of options:

main_menu
        puts "Please select from the following options:"
        print "\n"
        puts "1. Change zip code"
        puts "2. Martian forecast"
        puts "3. Earth forecast"
        puts "4. Martian archived weather data"
        puts "5. Earth archived weather data"
        puts "6. Current Martian weather"
        puts "7. Current Earth weather"
        puts "8. Exit"

To correlate to that, I had to write a slue of methods to compare all the data in various ways. But, it was super easy to do that, because I had already set up all my data as objects!

This project was super rewarding. I got to play with NASA data, but most importantly I was really feeling comfortable with object-oriented Ruby, and with manipulating APIs. Here is a little walkthrough of my program (with a bad mic… working on that).

Inaugural Post!

Why be a software engineer?

This the first blog post for my latest endeavor of pursuing a career in web development at the Flatiron School. Last year I left my job as a photographer at Revlon to pursue emerging tech and art at NYU Tisch’s ITP graduate program. Through this program I learned that I really enjoyed programming, having made a lot of projects using p5.js, and found myself craving more technical training in programming. That, combined with the birth of my first son and the economic circumstances surrounding COVID-19 lead me to abandon my graduate degree at NYU and pursue coding at the Flatiron School instead.

What I like most about programming is the problem solving. I love solving puzzles, and programming feels just like solving puzzles all day. I can get behind that. So here’s to a new life adventure in programming.

If you’re curious below are some examples of my creating coding projects from ITP.

This program demonstrates how we use red shift and blue shift to prove the expanding universe by manipulating pixel data.

Click inside the program window to interact with it.

Spacebar for fullscreen.
Press 1 or 2 to toggle redshift or blueshift. Press 0 to reset.

This program is just a fun space-themed interactive animation.

Click and drag to zoom, double-click to change colors.

Press Spacebar for fullscreen.

Press "C" to reset colors to default.
This one is the basis of a visualization I made for a baby kick sensor I made for my wife.

Click on the box to start the program.
Spacebar for full screen.